Adding a staff member
Give someone their own login so their appointments show against their name and they only see what they need to. You do not set their password — PetDesk emails them an invitation and they choose it themselves.
Give someone their own login so their appointments show against their name and they only see what they need to.
1. Open Staff Management
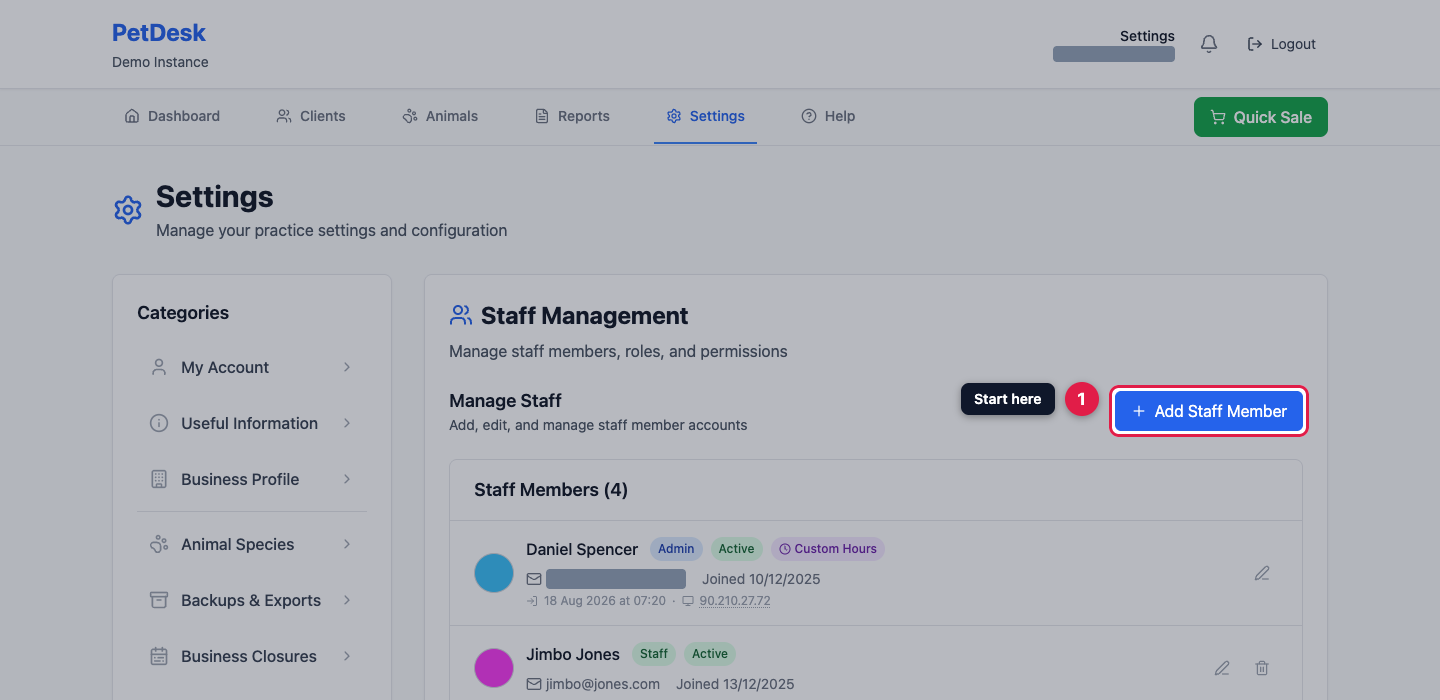
Go to Settings and choose Staff Management, then click Add Staff Member.
2. Name, email and colour
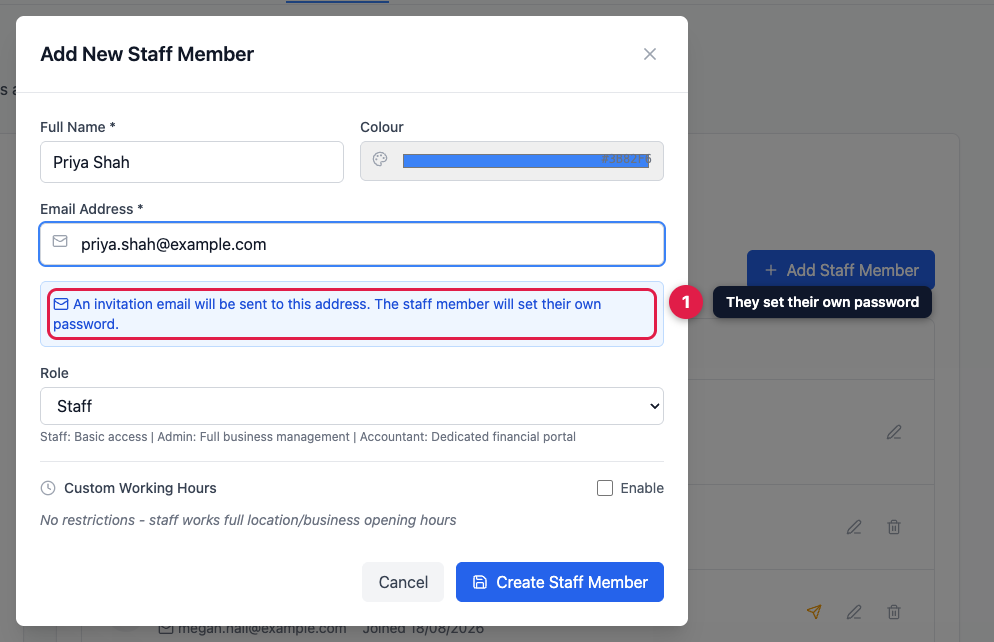
You don't set a password for them. PetDesk emails an invitation to the address you enter and they choose their own. The colour is how their appointments appear on the calendar, which makes a shared diary far easier to read.
3. Choose their access level
This is the important bit. There are three levels:
| Role | What they can do |
|---|---|
| Admin | Everything. Bookings, customers, settings, reports and billing. Give this to owners and managers. |
| Staff | Almost everything day to day — bookings, customers and animals — but no access to reports. The right choice for most of your team. |
| Accountant | A cut-down financial login. They see transactions and reports, not your customers' details. Ideal for an external or dedicated accountant who needs the numbers and nothing else. |
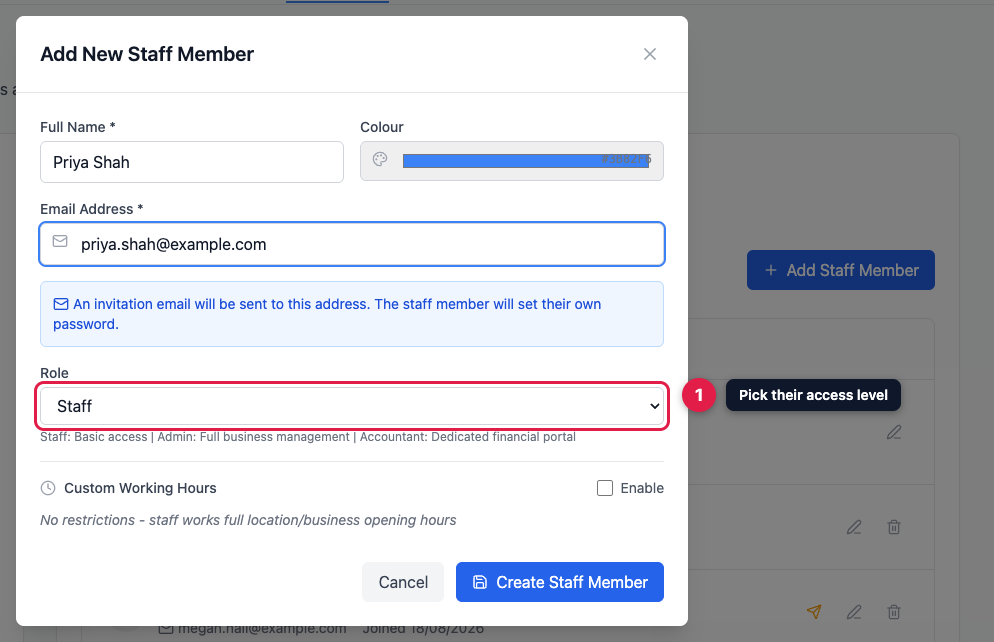
You can change someone's role later with the pencil icon, so start them lower if you're unsure.
4. Working hours (optional)
Leave Custom Working Hours switched off and they're available across your normal business hours. Switch it on for part-timers so they're only offered for appointments on the days and times they actually work.
5. Send the invitation
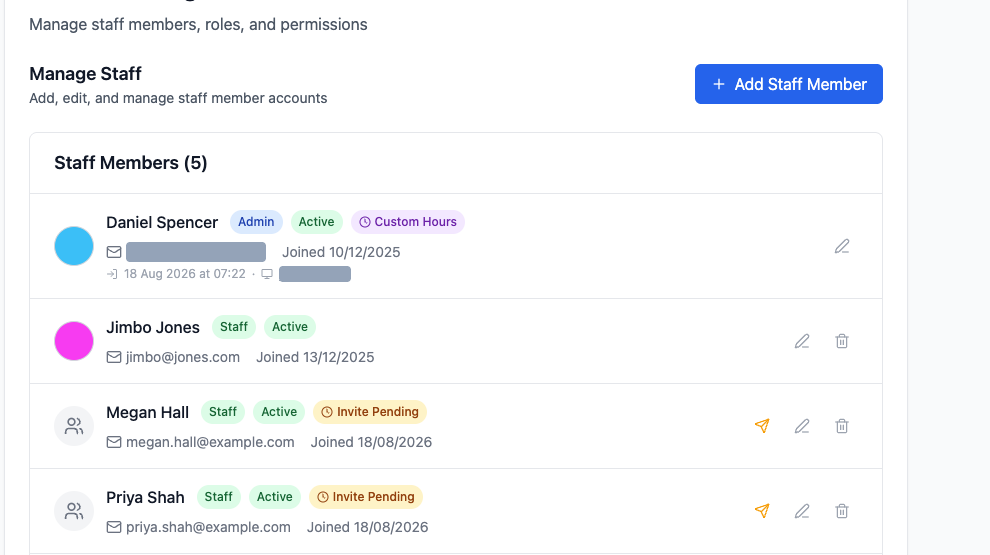
Click Create Staff Member. They appear in your list marked Invite Pending until they follow the email and set a password. If it never turns up, the paper-plane icon sends it again.