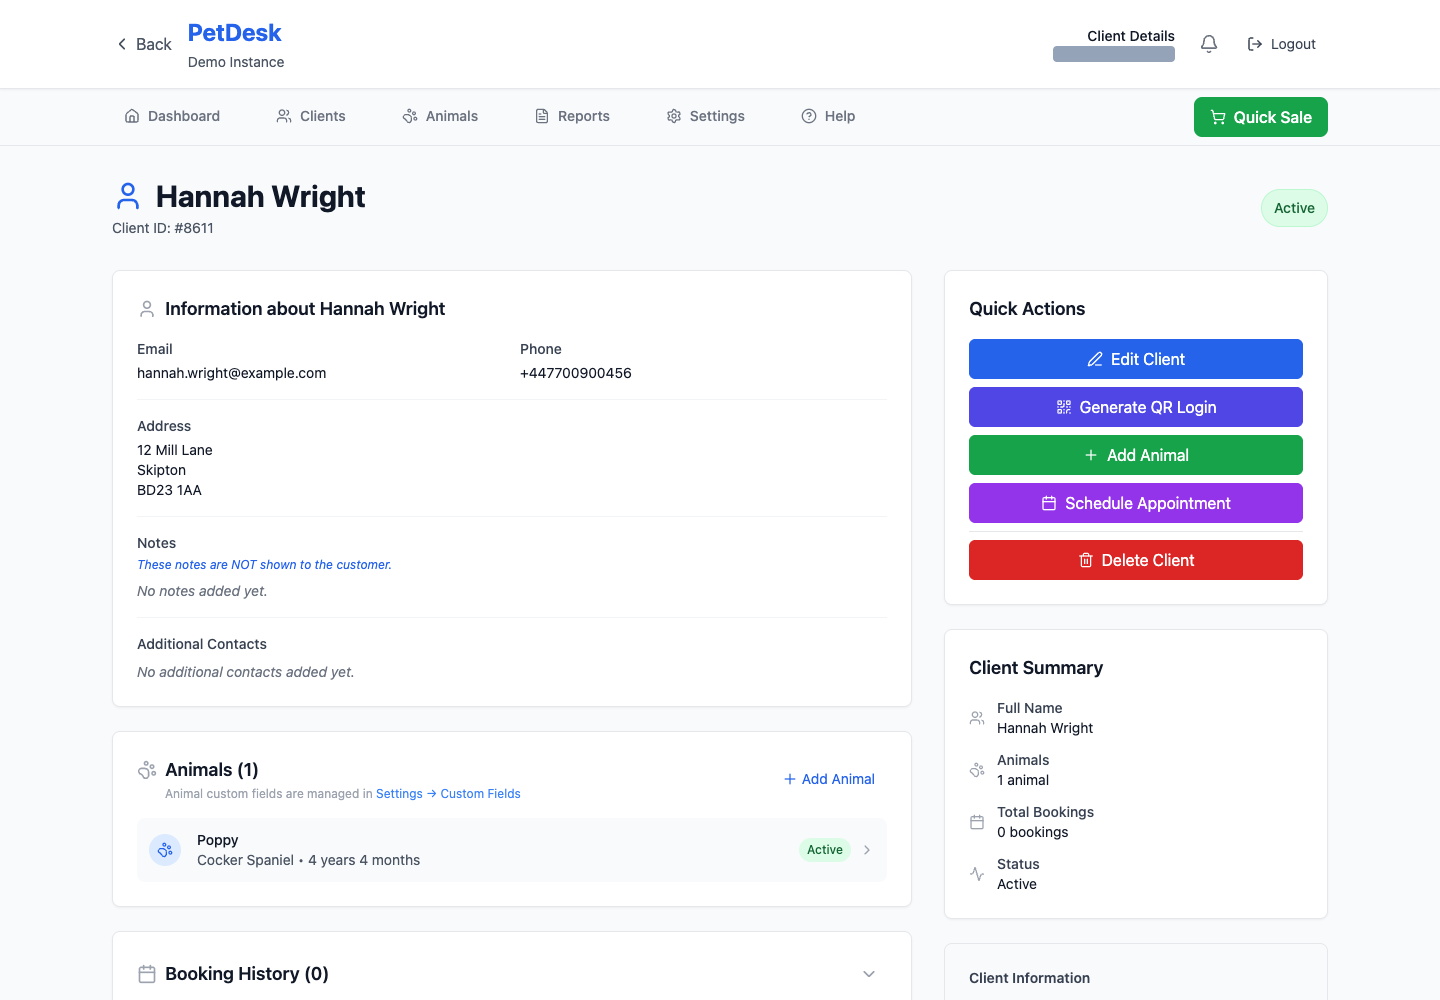
Adding a customer and their pet
Add the owner first with their name and contact details, then add each animal underneath them. A customer can have as many animals as they need, and everything from bookings to messages hangs off this record.
Every booking belongs to a pet, and every pet belongs to a customer — so a new customer starts here.
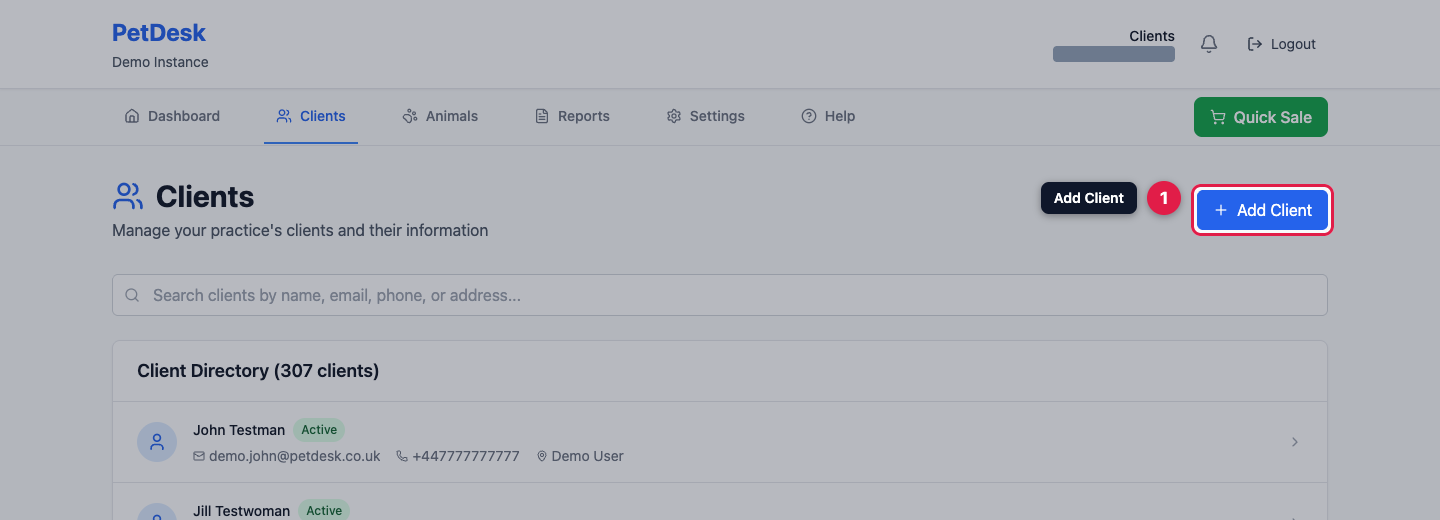
1. Go to Clients
Open Clients from the top menu and click Add Client.
2. Enter their details
Only the name is required, but a mobile number is worth having — it's what lets PetDesk send booking confirmations and reminders. An address helps if you do home visits.
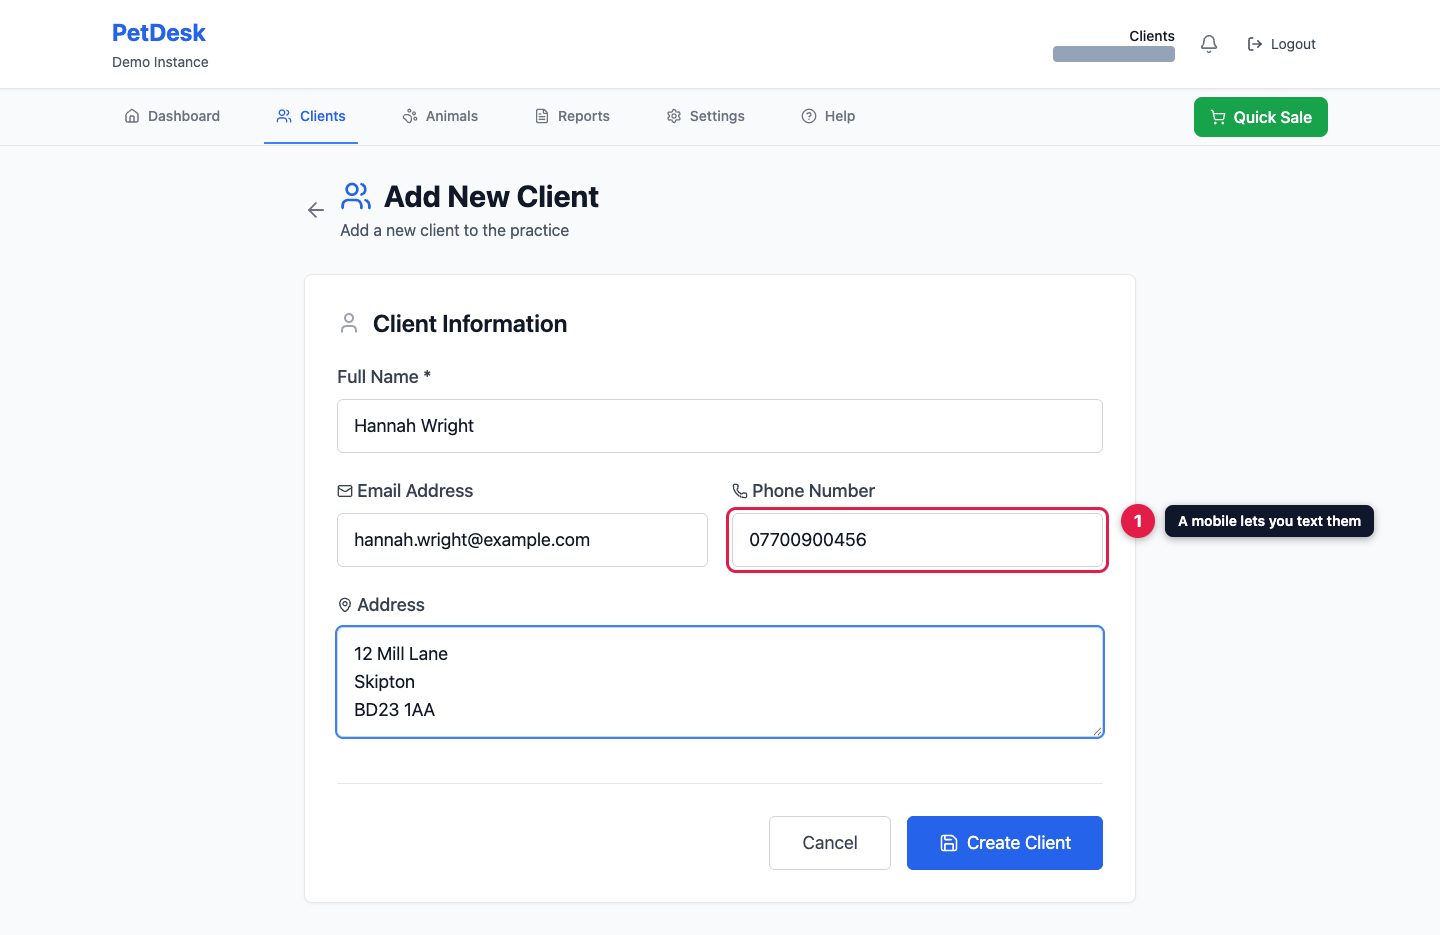
Phone numbers must be unique. If you get a warning that the customer already exists, search for them — they're probably already on your books.
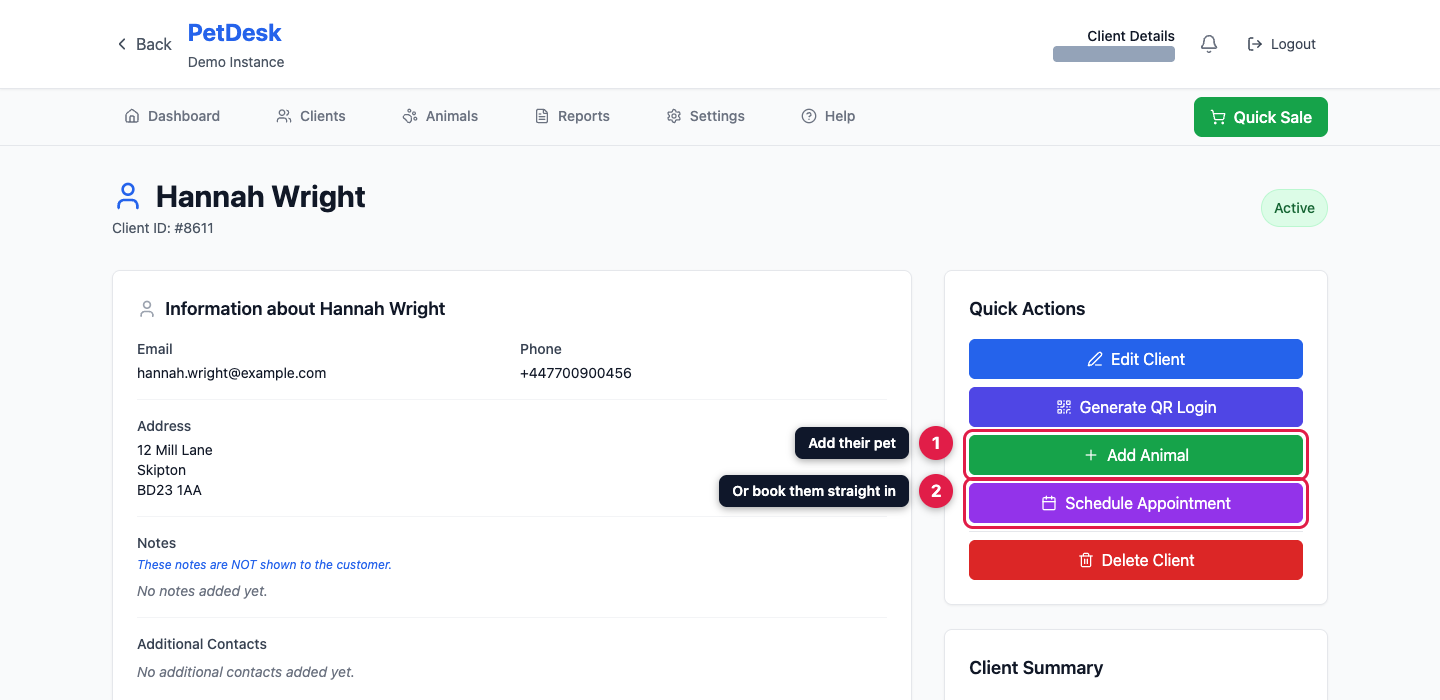
3. Add their pet
Saving takes you straight to the customer's page. Click Add Animal to add their first pet.
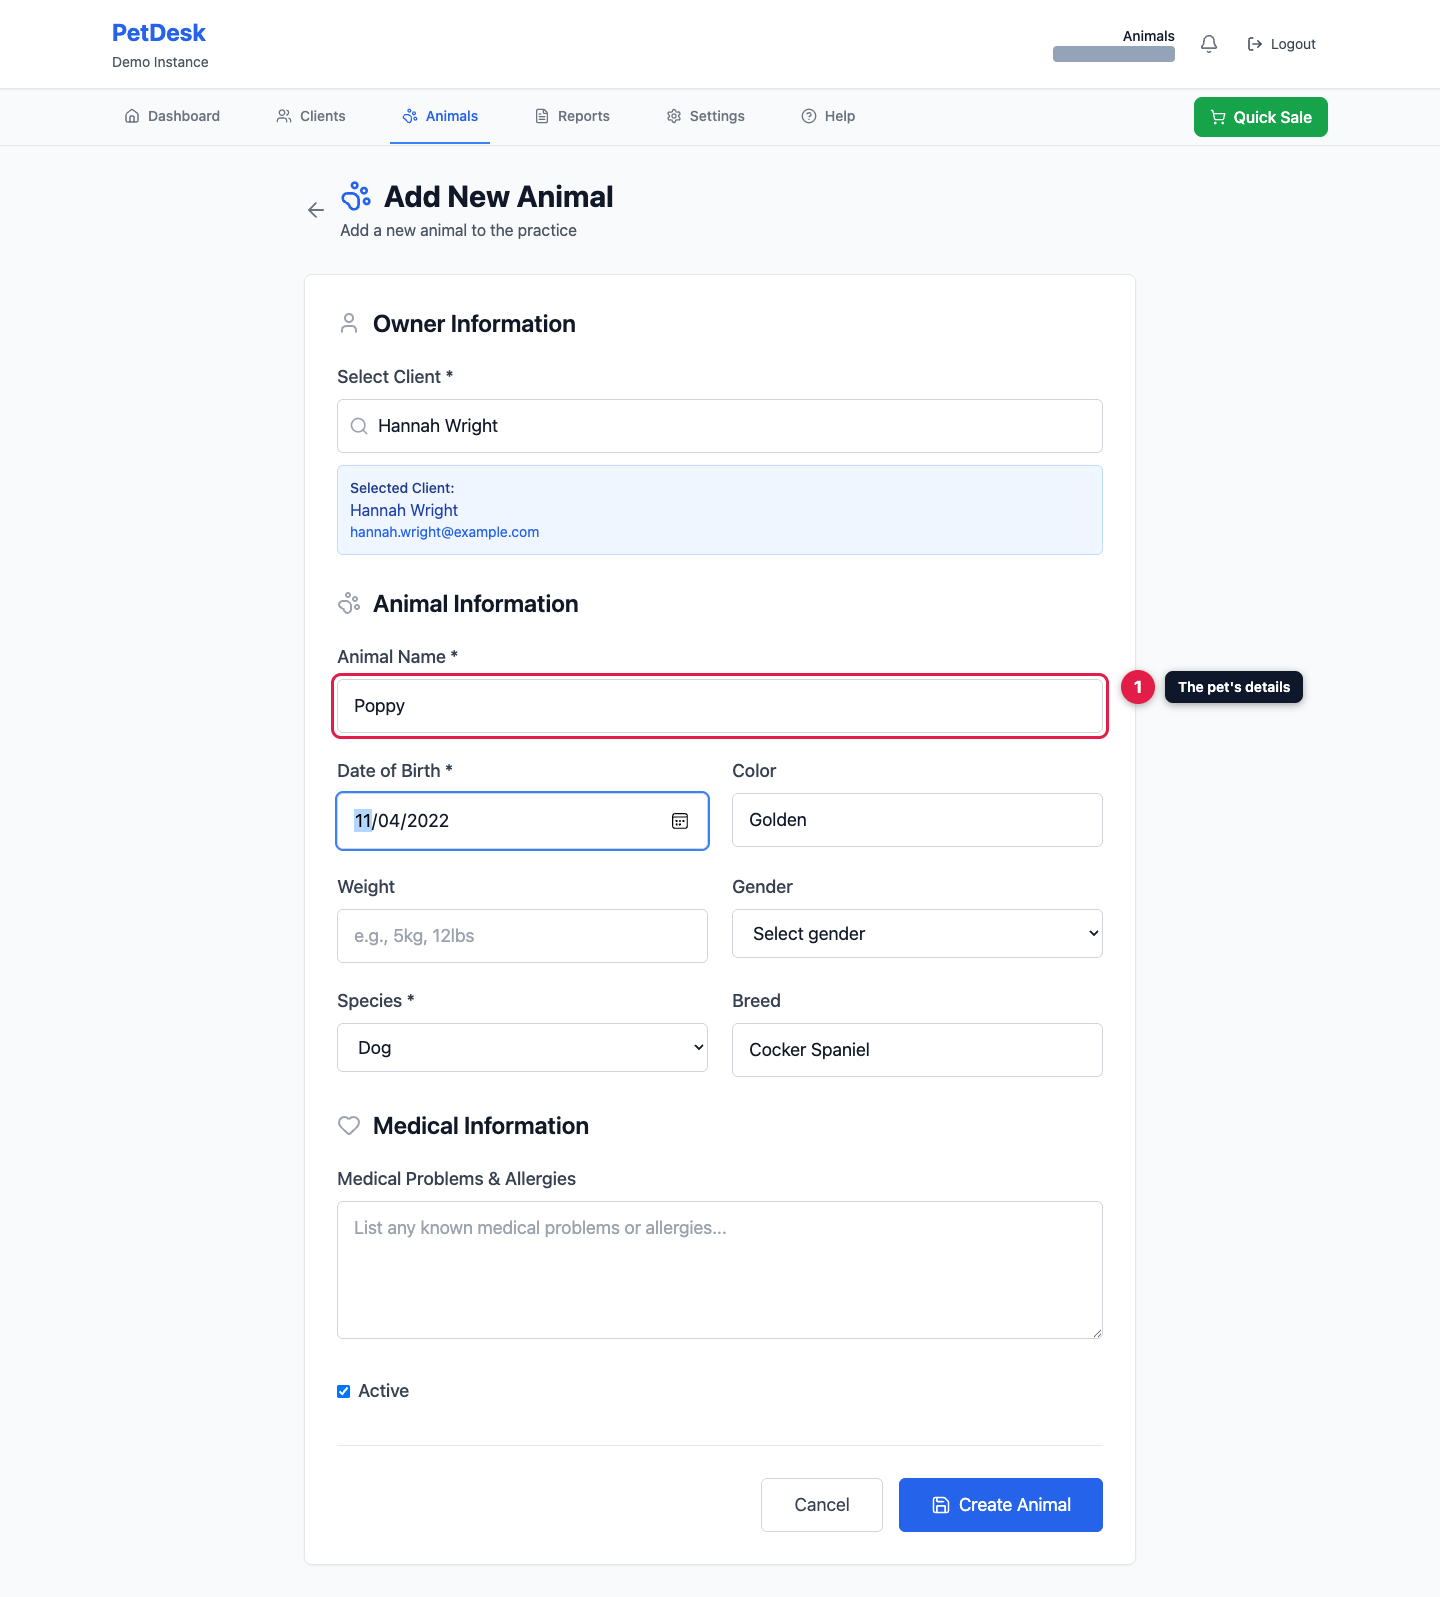
4. The pet's details
The owner is filled in for you. Name, date of birth and species are required; breed, colour, weight and any medical notes or allergies are optional but worth adding while you've got the customer in front of you.
Got more than one pet to add? Repeat from Add Animal — there's no limit.
5. Ready to book
The pet now shows on the customer's page. Use Schedule Appointment to book them in without searching for them again.